For the most part this tutorial follows the instructions outlined here.
This is part 2 of my Raspberry Pi and WS2801 LED post. Part one went over the preparation and parts needed to make the LEDS and Raspberry Pi talk to each other. Part 2 will focus on putting everything together and capitalizing on that communication.
We used a breadboard when we were prototyping the power and data connections between the RaspberryPi and the LEDS. According to the diagram below our power is coming from an external 5V source (not from the RaspberryPis micro usb) this is needed to properly power the LEDS.

I did a lot of scavenging and found a 5v 3amp power supply for the LEDS and the RaspberryPi. We actually had some success powering the RaspberryPi and the LEDS through USB but found that the last LEDS in the strand were a bit dimmer. In the final build we distributed the power every 10 LEDS but i'll discuss that in a later post.
The power supply is connected into this which is then connected to the breadboard via jumper cables.
The pictures below are from our initial setup.


We didn't use the breadboard in our final version, it was just an easy way of distributing the power and data connections without stripping cables.
Once the LEDS are connected it's time to run some software to see if everything works correctly.
If you followed part one of this tutorial you should have the Adafruit WebIDE installed and running at this point. We'll use this to test our LEDS.
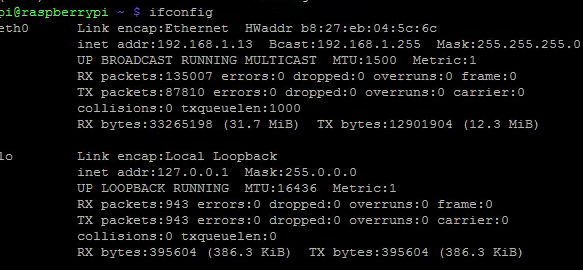
I had some trouble with the local name that the you're supposed to be able to access the IDE from .
http://raspberrypi.local:3000 according to the tutorial. My local network couldn't resolve the name, but it had no trouble accessing the IDE via IP. So navigate your browser to http://YOUR-RPi-IPADDRESS:3000
If all went well you'll be greeted with this page:

The IDE requires you to sign up for a BitBucket account. Which will privately hold your code (unless you want it public) in their cloud. This worked out pretty well for me since i had to install the WebIDE a few times for it to work correctly. I wrote some custom scripts which were saved between installs on my BitBucket account.

The IDE requires you to sign up for a BitBucket account. Which will privately hold your code (unless you want it public) in their cloud. This worked out pretty well for me since i had to install the WebIDE a few times for it to work correctly. I wrote some custom scripts which were saved between installs on my BitBucket account.
Once signed in navigate through the examples to Adafruit_LEDPixels.py:


The arrow in the picture point out:
SPICLK = 18
SPIDO = 17
These are the pins that the Pi is going to send data to when this python script is run.
This post here explains why were using these pins on the RaspberryPi.
If everything looks like its in the right spot hit the 'Run' button up top. If it worked you'll see the LEDS light up RED, GREEN, BLUE, then cycle through a spectrum of colors.
I sat and screwed around with the python scripts for a bit once I hit this point. With some fairly simple changes you can do some cool stuff with the LEDS from this point. Heres a quick script I wrote to check your gmail for the subject ALARM.
 #!/usr/bin/env python

 import RPi.GPIO as GPIO, feedparser, time

 import thread

 DEBUG = 1

 SPICLK = 18

 SPIDO = 17

 ledpixels = [0] * 40

 GPIO.setmode(GPIO.BCM)

 USERNAME = "GMAILUSER"

 PASSWORD = "GMAILPASS"

 NEWMAIL_OFFSET = 1

 MAIL_CHECK_FREQ = 60

 def Color(r, g, b):

      return ((r & 0xFF) << 16) | ((g & 0xFF) << 8) | (b & 0xFF)

 #Colors

 RED = Color(255, 0, 0)

 BLUE = Color(0, 0, 255)

 GREEN = Color(0, 255, 0)

 ORANGE = Color(177, 53, 47)

 OFF = Color(0, 0, 0)

 colors = []

 allfalse = False

 def writestrip(pixels):

      spidev = file("/dev/spidev0.0", "w")

      for i in range(len(pixels)):

           spidev.write(chr((pixels[i]>>16) & 0xFF))

           spidev.write(chr((pixels[i]>>8) & 0xFF))

           spidev.write(chr(pixels[i] & 0xFF))

      spidev.close()

      #time.sleep(0.002)

 def setpixelcolor(pixels, n, c):

      if (n >= len(pixels)):

           return

      pixels[n] = c

 def alert(color, delay):

      for i in range(len(ledpixels)):

           setpixelcolor(ledpixels, i, color)

           writestrip(ledpixels)

      time.sleep(delay)

 def multiColor(colors):

      b = 0

      for i in range(len(ledpixels)):

           setpixelcolor(ledpixels, i, colors[b])

           writestrip(ledpixels)

           time.sleep(delay)

           b = b + 1

           if(b >= len(colors)):

                b = 0

 def loopColors(status, colors):

      if(status == True):

           print("new thread")

           for a in range(len(colors)):

                alert(colors[a], .5)

                time.sleep(.5)

      else:

           alert(OFF,5)

 class Emailees:

      def __init__(self, email, hasEmail, color):

           self.email = email

           self.hasEmail = hasEmail

           self.color = color

 def emailAlarmCheck(delay):

      allmails = feedparser.parse("https://" + USERNAME + ":" + PASSWORD +"@mail.google.com/gmail/feed/atom")

      alarm = Emailees("ALARM", False, RED)

      for i in range(len(allmails.entries)):

           if(allmails.entries[i].title == alarm.email):

                alarm.hasEmail = True

                colors.append(RED)

                print("Found ALARM")

      allfalse = [alarm.hasEmail]

      loopColors(allfalse, colors)

      print(len(allmails.entries))

      time.sleep(1)

 while True:

      emailAlarmCheck(.5)

  ##
Congratulations! If you made it this far you're only one step away from playing your movies with dynamic LEDS. My next and final part will cover Boblight, XBMC addons, Adalight, and attaching your lights to some sort of structure.